Sunday, March 16, 2014

You're Gonna Want To See This!

I have to be honest.  Until about 3 years ago, I never knew that so many things could be homemade and made with things that I already have in my pantry!  I get very excited when I find a new recipe of things to make.  And as everyone knows, if you make it at home, it tastes so much better!  This recipe is no different.

Are you ready?

Are you sure??

Here it is!!!!

HOMEMADE MARSHMALLOW FLUFF!!!!!!

Oh yeah, that was NOT an error.  I made this today and I almost couldn't stop eating it right out of the jar.  :)

So here's what I did...

Ingredients:
3 large egg whites
1/3c water
2/3c plus 2T sugar
3/4c light corn syrup
1t pure vanilla extract

* Place egg whites in a large mixing bowl. Using an electric mixer with a whisk attachment, beat the egg whites until light and frothy.

* Keep the mixer running and slowly pour in 2 tablespoons of sugar. Continue to beat until soft peaks form.

* Meanwhile, combine 1/3 cup water, corn syrup, and remaining 2/3 cup sugar in a large saucepan over medium heat. Bring to a boil and continue to cook, stirring occasionally, until it reaches 240°F (it will take 10-15 minutes)

 * Turn mixer on to low and slowly pour syrup down the side of the bowl into the egg white mixture.

* Increase speed to high and beat mixture for 6-8 minutes. Pour vanilla into mixture and beat on high for around 2 more minutes, until mixture looks like marshmallow fluff.

*Let cool and then pour into air-tight container and store in fridge for up to a month.


**Don't forget to lick the whisk!!!  Don't let any of this go to waste!

Saturday, March 15, 2014

Mozzarella Cheese...Made From Scratch

Yep, you can make this stuff at home and it is SO much better than the cheese that you get from the store.  But then again, isn't everything??  Oh and did I mention that you can make it in under and hour?

Here's what you need:

1 gallon whole milk- leave out to reach room temperature, do not use ultra-pasteurized
1/4t liquid rennet
3/4c bottled water, unchlorinated, room temperature
1 1/2t citric acid
1t salt
ice

You're going to need a few specific items too.

stainless steel pot, large enough to hold the milk and water
candy thermometer
colander/strainer or cheese cloth (I use both)
slotted spoon
microwave safe bowl, medium size
and last, but not least, a microwave

Now, here's what you do:

* Add citric acid to water then add to gallon of milk in pan. (Here's what it'll look like.  You should see a lot of "chunks".  This time, chunky milk is a good thing!)
*  Heat SLOWLY ON A LOW HEAT to 90-92 degrees Fahrenheit and remove from heat.
* Add 1/4t of liquid rennet, stirring slowly for a few seconds.
* Cover and leave for 30 minutes or until you see the curd has set and it will ‘break’ when cut. (You will know this by putting your finger into the curd and being able to pull it open without it sticking to you.) 
* Cut the curd with the knife into 1 inch (approx) squares and leave for five minutes, to help the curds continue to form.
* Put back on heat and bring up to 105 degrees Fahrenheit (careful not to go over 110 degrees and beyond, it will start to cook it!). The whey will continue to be extracted from the curd.
*  Lift the curds into the strainer/colander using the slotted spoon, allowing as much whey as possible to drain back into the pot as you transfer the curd. Leave for 5 minutes.
* Using your hand, hold the curd and drain off the rest of the whey (pressing gently) and transfer to a bowl. (If using a cheesecloth, lift it and twist the top gently to apply slight pressure.)
* Microwave for 1 minute, and remove. Drain the whey, again using your hand to press out the curd a little to help with removing the liquid. NOTE: BE CAREFUL, USE CAUTION AS CURD CAN GET EXTREMELY HOT. IF IN DOUBT, USE RUBBER GLOVES.
* Knead gently, folding the curd into itself a few times. Microwave again for 30 seconds. (Drain whey as you go)
* Remove from microwave, drain whey, and repeat kneading of curd. If it begins to stretch, start to work the mozzarella by stretching it out. If it is breaking up, microwave again for 20 seconds until it is soft and pliable. Always drain off surplus whey as you work.
*  Add the salt and work it into the ball of cheese by kneading and folding the cheese into itself again. Knead into a ball and it should become shiny and smooth to the eye. If it breaks apart reheat again for 20 seconds, it must remain smooth and supple.
 * Place in a ice bowl for 15 minutes to cool it.
*  Eat and joy, or store wrapped in plastic wrap for up to one week. However, eaten straight away when fresh will be best!

My notes***

-I have made cheese a few times and just when I thought that I was messing it up and needed to toss it, I found a solution.  I take a wooden spoon after the second time in the microwave and I stir.  Eventually, it'll come together.  Start stretching and kneading and draining the whey.  All will be fine!

-I don't always form my cheese in a ball, but you can.  I shape it into what will be easiest for me to slice or cube for whatever recipe I'm going to use it in.

-You can get a product called Junket Rennet and it's usually in the ice cream topping section.  I have to say, this has NEVER worked for me.  To me, the name is right, it's "junk".  But, who knows, it may be ideal for you.  I ordered my rennet online after trying and failing at making 5 batches of cheese.  Yeah, that happened...in one day.  Anyways, if you use the Junket, I would use 1/2 tab or more dissolved in about 1/4c bottled water.

-When you're draining the whey, if you do it in the sink, it can be quite messy, especially your first or second time.  You will soon find out the cheese curds will get everywhere and are not so easy to clean up.  What I did was spray my empty since with Pam.  That way, all I had to do was rinse the sink out and wipe it down and all the curds were gone!

Ok, what are you waiting for??  Get to the store and get in that kitchen!!

:)


Thursday, March 13, 2014

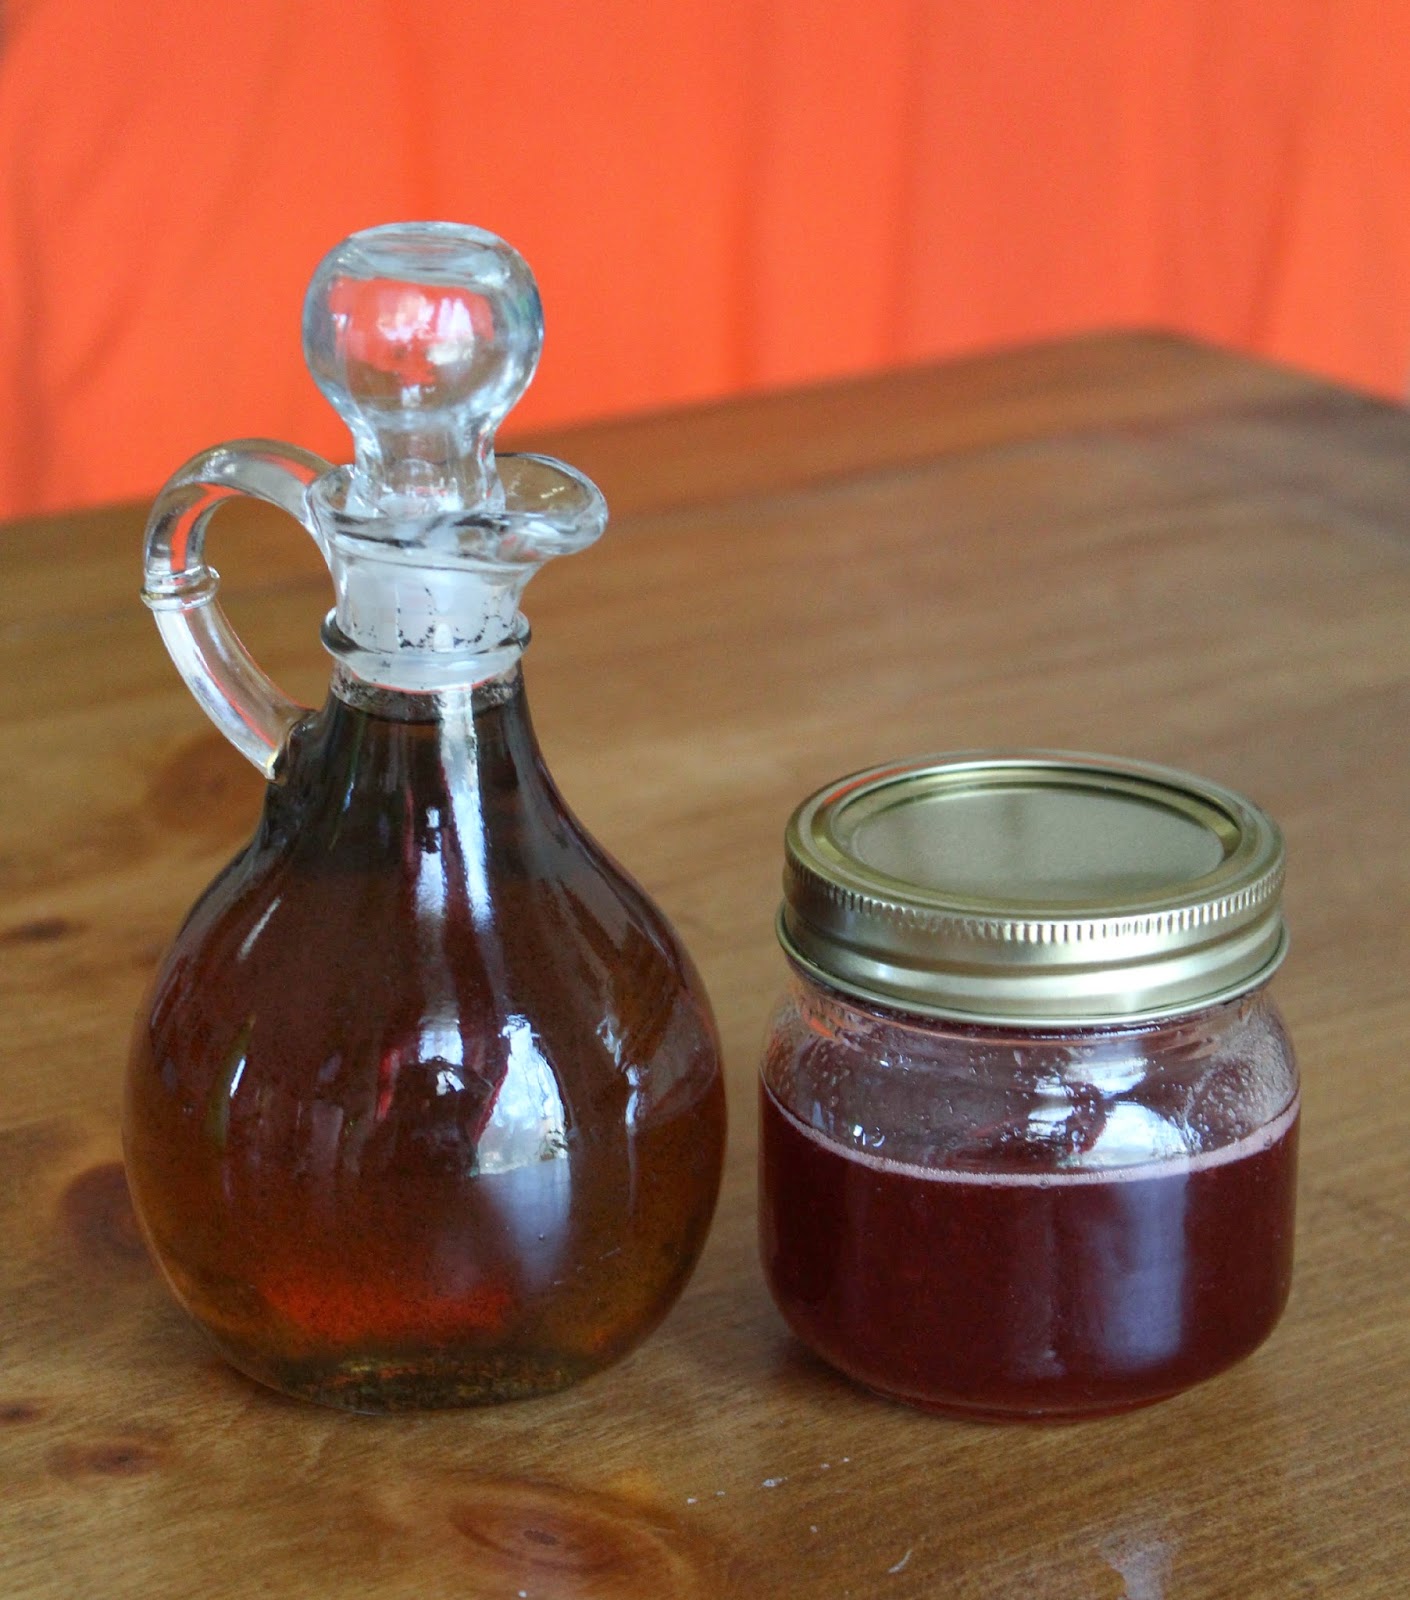
Homemade Strawberry and Vanilla Syrups

I see homemade chocolate syrup recipes all the time on Pinterest or on Facebook, but I have never seen any for vanilla or strawberry.  What are they...chopped liver? 

If you're like me, chocolate is not exactly your "go to" flavor.  I rarely even use anything that's strawberry flavored because it's usually artificially flavored and it never really tastes like strawberry.  However, this recipe uses real strawberries and no strawberry extracts!  YUM!! 

So here we go...

First, I made the vanilla syrup.  Here's what you need:

1 3/4c water
1 1/2c sugar
1/4c brown sugar
1 1/2T vanilla paste

Combine all, except vanilla paste, in a medium saucepan and cook on medium heat.  When it starts to boil, start your clock.  Boil for 10-15 minutes and then remove from heat.  Stir in vanilla bean paste.  Let it cool some and then put it in whatever container you're gonna use.  (I put mine in a fancy syrup thing thinking I had 2, but sadly, 1 was lost.  Very sad day.)  Use it like you would the name brand syrups that you used to buy.  ;)
Next up: Strawberry Syrup

Here's what ya need:

1c sliced, frozen strawberries
1/2c sugar
1/2c water
1/4t pure vanilla extract

Add water, strawberries and sugar to a small saucepan and bring to a boil over medium heat.  When it starts to boil, start your timer again and boil for 10-12 minutes.  Remove from heat and add vanilla.  Let it cool slightly and strain into whatever container you're going to use.  You can use the strawberries later for yogurt or ice cream or whatever you want just so they don't go to waste.
My notes:

*Vanilla bean paste: not to be confused with vanilla beans or vanilla extract.  It's kind of a combo of the two.  It's like a thick extract with vanilla bean specks in it.  It is oh so good!!

*Let both syrups come to room temperature before you use them.  They should be good and thickened up by then.

Enjoy!!


Thursday, February 27, 2014

Pasta: Made From Scratch

Don't panic, it's easier than you think, I swear!

I've always wanted to make homemade pasta, but every recipe that I found called for semolina.  I searched and searched every grocery store that I ever walked in and I never found it.  So, eventually, I gave up.  Then, one day I was watching the Food Network and one of the chefs was making pasta...with all purpose flour!!  My heart literally jumped for joy!!

My first mission now, was to get the pasta roller kit for my KitchenAids. I mean, if I don't have to roll the dough out by hand, why should I?  So, off I went to search the local stores.  After 2 weeks of searching and realizing that I would have to order it from online in order not to have to amputate my left arm to purchase it.  I was deciding which store/site I was going to buy the kit from and while walking through Wal-mart, I saw one on the shelf.  Were my eyes deceiving me?  Could this be true?  I could buy the kit right now and not have to wait for it to be ship?  Why, yes, yes I could!  The pasta gods were definitely smiling on me that day.

Mission 2: drying rack.  I pretty much knew that this was going to have to be ordered online since I didn't see one anywhere while I was comparison shopping for the kit.  I checked a few stores anyways, just in case.  I had seen a rack once while online and it was $13 plus shipping for one rack.  I had a feeling that I would need 2 since I know that each batch of pasta dough makes a lot.  That would mean $26 plus shipping plus more waiting.  I didn't want to do that because I was itching to make this pasta!  So, I got creative.  I went to the laundry section where they have clothespins and hangers and such and I found it.  A dryer rack.  Who says drying racks are just for clothes?

So, now I'm ready.  Ready to make my first ever batch of pasta.  Here's the recipe...

  • 2 cups flour
  • 3 eggs
  • 1/2 teaspoon salt
  • 1/2 teaspoon extra-virgin olive oil

  •  Mound the flour on a clean work surface. Hollow out the center making a well in the middle of the flour with steep sides.

    Break the eggs into the well. Add the salt, and olive oil to the hollow center and gently mix together with a fork. Gradually start incorporating the flour by pulling in the flour from the sides of the well. As you incorporate more of the flour, the dough will start to take shape.


    With your hands or a bench scraper continue working the dough until it comes together. If the dough is too dry, add a little water; if too wet or sticky, add a little flour.

    Begin kneading the dough and keep kneading until it becomes smooth and elastic, about 8 to 10 minutes. At this point, set the dough aside, cover it with plastic, and let it rest for 15 to 20 minutes. You can store the dough in the refrigerator for up to 24 hours, but allow it to return to room temperature before rolling it out.


    Divide the pasta dough into 4 even sections. Keep each section covered with plastic wrap or a clean towel while you work with each one. Flour the dough, the rollers of a pasta roller (or your rolling pin), your hands, and the work surface.

    If using a pasta machine: Flatten 1 of the of the dough pieces between your hands or with a floured rolling pin until it forms a thick oval disk. Dust the disk, the roller, and your hands with additional flour. Flour a baking sheet to hold the rolled out finished pasta.

    With the roller on the widest setting, pass the pasta through the machine's rollers a few times until it is smooth. Fold the dough over into 1/3, and continue to pass through a few more times until the pasta is smooth again. Begin adjusting the pasta machine settings to become thinner, passing the dough through a few times at each setting.


    If rolling the pasta by hand: Flatten a dough piece into a thick oval disk with your hands. Flour a baking sheet for the rolled out finished pasta. Place the oval dough disk on a floured work surface, and sprinkle with additional flour. Begin rolling out the dough with a floured rolling pin working from the center of the dough outwards, constantly moving the dough and lifting it to make sure it's not sticking.


    That's it!  Now all you have to do is dry it, freeze it or cook it!  I made my first batch so I could post on here and now I'm going to make more for dinner.  :)

    Don't forget to experiment and add flavors or herbs or ANYTHING!  Add them to the eggs before you incorporate the flour, though.  If the dough is too dry, just add a little water.  Too wet, add a little flour.

    Have fun!


    Wednesday, February 5, 2014

    Lava Isn't Just For Volcanoes Anymore!

    Almost any sit-down restaurant you go to nowadays has a lava cake on their menu.  If you're like me, you tried to figure out how to make them thinking it would be hard.  Trust me, they aren't hard to make at all.  Now, if you're still like me, sometimes a plain ol' chocolate lava cake just isn't want you want or what you have a hankerin' for.  How about a caramel apple one...with vanilla ice cream...garnished with a caramel drizzle and powdered sugar?  That may just hit the spot!

    I acquired this recipe a few years ago, and like any home cook, tried it out on my guinea pig...er... family.  I'm not surprised to say that it was a hit!  Here's how the recipe goes...

    Ingredients:
    2 tablespoons cinnamon graham cracker crumbs (2 squares)
    3 whole eggs
    3 egg yolks
    3/4 cup packed brown sugar
    1 cup caramel topping, plus more for drizzle
    1/2 cup Gold Medal all-purpose flour
    3/4 cup chopped peeled apple
    powdered sugar, if desired

    Directions: 

    Heat oven to 450°F Spray bottoms and sides of 6 (6-oz) custard cups with baking spray with flour. Sprinkle 1 teaspoon cracker crumbs onto bottom and around side of each cup.

    In large bowl, beat whole eggs and egg yolks with wire whisk until well blended. Beat in brown sugar. Beat in caramel topping and flour until well blended. Stir in apple. Divide batter evenly among custard cups. Place cups on cookie sheet with sides. 
    Bake about 15 minutes or until sides are set and centers are still soft but not liquid (tops will be slightly puffed). Watch carefully—cakes can overbake quickly. Remove from cookie sheet. Let stand 3 minutes.
    Run small knife or metal spatula along sides of cakes to loosen. Immediately place heatproof dessert plate upside down over top of each cup; turn plate and cup over. Remove cup. Sprinkle cakes with powdered sugar and drizzle with more caramel (if desired). Serve warm and with ice cream!
    The picture above was before the ice cream and drizzle.  I just wanted you to see it in all it's wonderful ooey gooey awesomeness!

    Monday, February 3, 2014

    Pin And Tweet

    I'm now on Twitter!!!!  Follow me at https://twitter.com/AngelHKirk

    I've been on Pinterest, who hasn't, but I FINALLY added a blog board.  :)  You can follow me there too.
     http://www.pinterest.com/mylittlebitty/my-bloggy-blog/

    I'm so excited to finally expand to a bigger audience!

    Happy pinning and tweeting y'all!


    Goop And Glue...Cake Decorating Essentials

    If you're ever out of baking spray, you know, the spray that has the flour in it, I have a solution for you.  Make some goop.  Funny name, I know, but you can make it out of things that I bet you already have in your kitchen.  All you have to go is mix together equal parts of flour, vegetable oil and shortening.  Whisk it until smooth and put it in a container with a lid.  Now just store it in your fridge until you need it.  If by chance it separates, just mix it back together.  The jar size that I made lasted for about 5 months. 

    I used...

    1/3c flour
    1/3c vegetable oil
    1/3c shortening

    I then placed it in a half pint mason jar with a lid and stored it in my refrigerator.  Whenever you need it, use a pastry brush (or napkin) and dip it in the goop and brush onto the pan.  Use enough to cover the pan completely without using too much.  A little goes a long way!


    Now, on to the glue.  Edible glue that is.  This is really good for gumpaste or fondant decorations that you need to stick together or onto a cake.  This works MUCH better than using water.  All it is, is tylose powder and water.  There's no real measurement to this, just remember that a little tylose powder goes a long way.  I used a very small container, filled it with water, added a very small amount of powder and mixed with a fork.  If it gets too thick, just add more water because your water to tylose powder ratio is off.  No big deal.  When you're done, put the lid on a store it in the fridge.
     

    Another edible glue (which I didn't make for this blog) is using fondant and adding water to make a paste.  More like the consistency of the white school glue.  You can store that in your fridge as well.  This, too, works better than using water to adhere your decorations.